SpringMVC之HelloWorld
springMVC的搭建过程:
1.导入jar
2.在web.xml配置springMVC的核心(前端)控制器DispatcherServlet
作用:加载springMVC的配置文件,在下方的配置方式下,DispatcherServlet
自动加载配置文件,此时的配置文件有默认的位置和名称
默认位置:WEB-INF下,默认名称:
例如以下配置方式的文件名:springMVC-servlet.xml
当加载了配置文件,springMVC就会根据扫描组件找到控制层
<servlet>
<servlet-name>springMVC</servlet-name>
<servlet-class>org.springframework.web.servlet.DispatcherServlet</servlet-class>
</servlet>
<servlet-mapping>
<servlet-name>springMVC</servlet-name>
<url-pattern>/</url-pattern>
</servlet-mapping>
3.创建一个POJO,在此类上加上@Controller注解,springMVC就会将此类作为控制层加载,让其处理请求响应
4.在控制层中,需要在方法上设置@RequestMapping(value=”hello”),
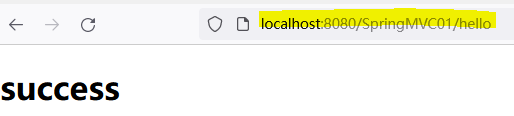
springMVC就是通过此注解将请求路径与控制层中的方法进行匹配,此时请求路径为localhost:8080/projectName/xxx
5.处理请求的方法会返回一个字符串,即视图名称,最终会通过配置文件中配置的视图解析器实现页面跳转
方式:prefix + 视图名称 + suffix,此为最终跳转的页面路径
HelloWorld
1.项目目录
2.web.xml
<?xml version="1.0" encoding="UTF-8"?>
<web-app xmlns:xsi="http://www.w3.org/2001/XMLSchema-instance" xmlns="http://java.sun.com/xml/ns/javaee" xsi:schemaLocation="http://java.sun.com/xml/ns/javaee http://java.sun.com/xml/ns/javaee/web-app_2_5.xsd" id="WebApp_ID" version="2.5">
  <display-name>SpringMVC01</display-name>
  <welcome-file-list>
    <welcome-file>index.jsp</welcome-file>
  </welcome-file-list>

  <servlet>
    <servlet-name>springMVC</servlet-name>
    <servlet-class>org.springframework.web.servlet.DispatcherServlet</servlet-class>
  </servlet>
  <servlet-mapping>
    <servlet-name>springMVC</servlet-name>
    <url-pattern>/</url-pattern>
  </servlet-mapping>

</web-app>
3.springMVC-servlet.xml
<?xml version="1.0" encoding="UTF-8"?>
<beans xmlns="http://www.springframework.org/schema/beans"
    xmlns:xsi="http://www.w3.org/2001/XMLSchema-instance"
    xmlns:context="http://www.springframework.org/schema/context"
    xsi:schemaLocation="http://www.springframework.org/schema/beans http://www.springframework.org/schema/beans/spring-beans.xsd
        http://www.springframework.org/schema/context http://www.springframework.org/schema/context/spring-context-4.0.xsd">

    <!-- 扫描组件,将加上@Controller注解的类作为springMVC的控制层 -->
    <context:component-scan base-package="com.atguigu.test"></context:component-scan>

    <!--
        配置视图解析器
        作用:将prefix + 视图名称 + suffix 确定最终要跳转的页面
        /WEB-INF/view/success.jsp
     -->
    <bean id="viewResolver" class="org.springframework.web.servlet.view.InternalResourceViewResolver">
        <property name="prefix" value="/WEB-INF/view/"></property>
        <property name="suffix" value=".jsp"></property>
    </bean>


</beans>
4.index.jsp
<%@ page language="java" contentType="text/html; charset=UTF-8"
    pageEncoding="UTF-8"%>
<!DOCTYPE html PUBLIC "-//W3C//DTD HTML 4.01 Transitional//EN" "http://www.w3.org/TR/html4/loose.dtd">
<html>
<head>
<meta http-equiv="Content-Type" content="text/html; charset=UTF-8">
<title>Insert title here</title>
</head>
<body>
    <a href="hello">测试springMVC</a>
</body>
</html>
5.success.jsp
<%@ page language="java" contentType="text/html; charset=UTF-8"
    pageEncoding="UTF-8"%>
<!DOCTYPE html PUBLIC "-//W3C//DTD HTML 4.01 Transitional//EN" "http://www.w3.org/TR/html4/loose.dtd">
<html>
<head>
<meta http-equiv="Content-Type" content="text/html; charset=UTF-8">
<title>Insert title here</title>
</head>
<body>
    <h1>success</h1>
</body>
</html>
6.TestController.java
package com.atguigu.test;
import org.springframework.stereotype.Controller;
import org.springframework.web.bind.annotation.RequestMapping;
@Controller
public class TestController {
/**
* 假设:localhost:8080/SpringMVC01/hello
*/
@RequestMapping("hello")
public String hello(){
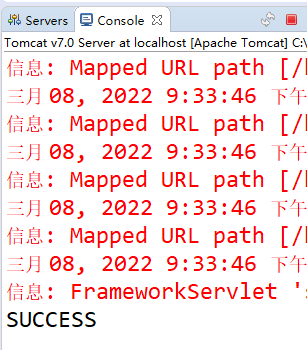
System.out.println("SUCCESS");
return "success";//视图名称
}
}
7.运行结果